Bug #9013
Task #8946: [BSN_CDB-SIT] : CDB009 - Auto Debit
TC 2.1.2.1.1 [Create Data Entry Functianality]
| Status: | Work Completed-End life cycle | Start date: | December 27, 2018 | |
|---|---|---|---|---|
| Priority: | Urgent | Due date: | January 04, 2019 | |
| Assignee: | % Done: | 100% | ||
| Category: | Auto Debit | Spent time: | - | |
| Target version: | - |
Description
1. "Back" button at detail screen not function.
Path : Login > Auto Debit > Data Entry > Enrollment tab > Enrollment - Data Entry > Add Data Details
Process :
1. Click on "Data Entry"
2. Click "Add" button
3. Click "back" button
Current Result : System display error message (Refer attachment : error-back-data entry.png)
Expected result : System display previous screen
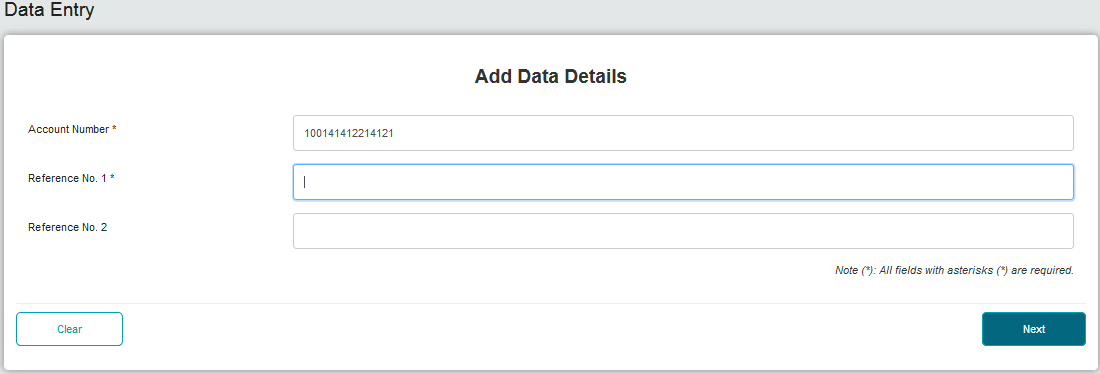
2. Invalid Account Number
Path : Login > Auto Debit > Data Entry > Enrollment tab > Enrollment - Data Entry > Add Data Details > Confirm
Process :
1. Click on "Data Entry"
2. Click "Add" button
3. Insert invalid value at account Number
4. Click "Next" button
Current result : System display "Confirmation Screen"
Expected Result : System throw error message : "Invalid Account Number"
3. Invalid Ref. number
Path : Login > Auto Debit > Data Entry > Enrollment tab > Enrollment - Data Entry > Add Data Details > Confirm
Process :
1. Click on "Data Entry"
2. Click "Add" button
3. Insert invalid value at "Reference No. 1"
4. Click "Next" button
Current result : System display "Confirmation Screen"
Expected Result : System throw error message : "Invalid Reference No.1"
4. Add Data Entry not functioning
Path : Login > Auto Debit > Data Entry > Enrollment tab > Enrollment - Data Entry > Add Data Details > Confirm >Data Entry screen
Process :
1. Click on "Data Entry"
2. Click "Add" button
3. Insert valid detail
4. Click "Next" button
5. Click "Confirm" at confirmation screen
6. System display data entry screen
Current result : System display Data entry screen without inserted data.
Expected result : System display inserted data.
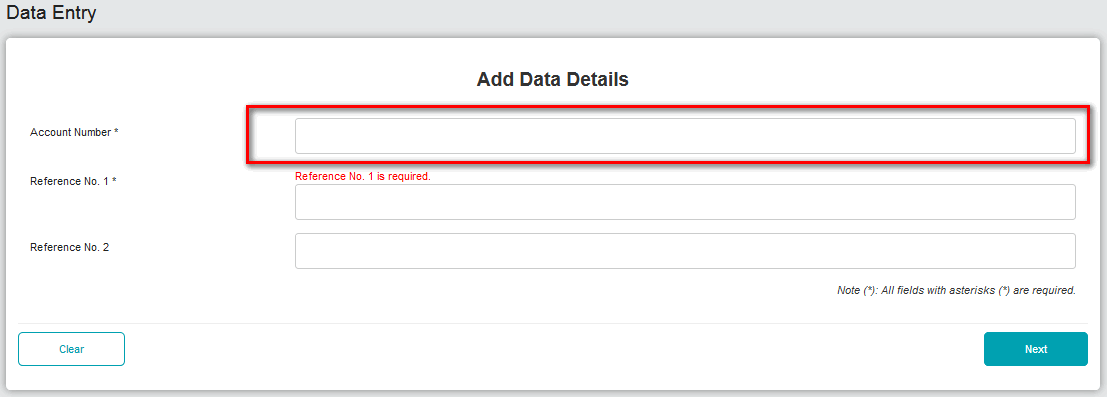
5. Missing inserted data
Path : Login > Auto Debit > Data Entry > Enrollment tab > Enrollment - Data Entry > Add Data Details >
Process :
1. Click on "Data Entry"
2. Click "Add" button
3. Insert valid detail at account no field
4. Leave empty value at "Reference No. 1 " field
5. Click "Next" button
Current result : System throw error message "Reference No.1 is required" and delete inserted valid account no.
Expected result : System just throw error message and keep valid data.
Refer attachment 1-error.png and 2-error.png
6. No validation at submit data
Path : Login > Auto Debit > Data Entry > Enrollment tab > Click Submit
Process :
1. Leave empty value at click "submit"
Current result : System display Confirmation" screen
Expected result : System display error message "At least one form needs to be filled in"
Refer attachment : confirm-withoutdata.png
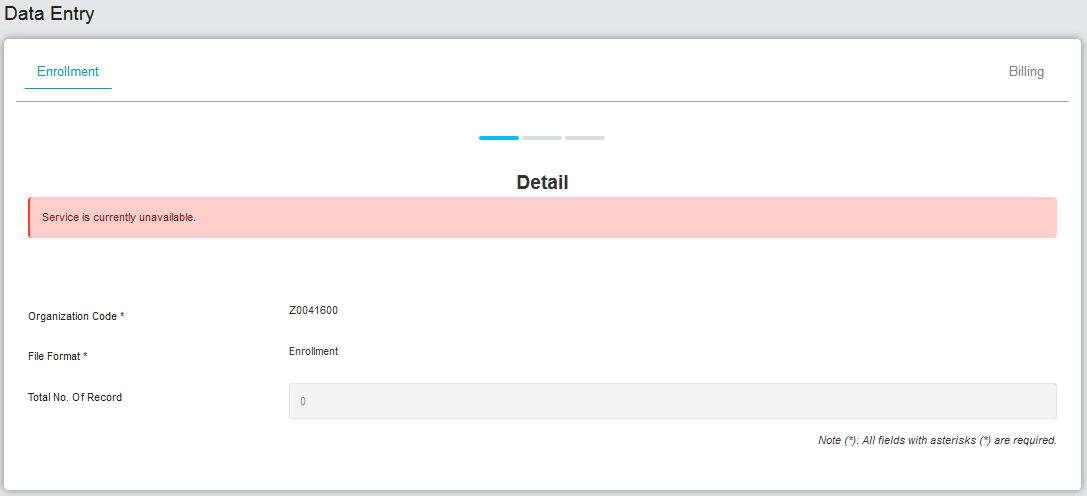
7. Upload data error
Path : Login > Auto Debit > Data Entry > Upload
Process :
1. Click on upload button
2. Choose file
Current result : Refer Attachment (upload-error.png)
Expected result : System display uploaded file
History
#1 Updated by Anonymous almost 6 years ago
- Description updated (diff)
#2 Updated by Anonymous almost 6 years ago
- File confirm-withoutdata.png added
- Description updated (diff)
- Due date changed from December 11, 2018 to December 12, 2018
#3 Updated by Anonymous almost 6 years ago
- File upload-error.png added
- Description updated (diff)
#4 Updated by Anonymous almost 6 years ago
- File error-back-data entry.png added
#5
 Updated by Nurul Hasnieza Bt Mohd Zamri almost 6 years ago
- Status changed from New - Begin Life Cycle to Finished Development
#6
 Updated by Siti Norahayu Mohd Desa over 5 years ago
- Status changed from Finished Development to Internal Testing
- Assignee changed from Nurul Hasnieza Bt Mohd Zamri to Erni Suhaireen Zulkifli
Hi Erni,
Please assist to test.
#7
 Updated by Erni Suhaireen Zulkifli over 5 years ago
- Description updated (diff)
- Due date changed from December 12, 2018 to January 01, 2019
- Status changed from Internal Testing to Development / Work In Progress
- Assignee changed from Erni Suhaireen Zulkifli to Ngoh Chee Onn
- Start date changed from December 11, 2018 to December 27, 2018
- % Done changed from 0 to 30
Below issue is not valid for current updated system:
1. "Back" button at detail screen not function.
4. Add Data Entry not functioning
5. Missing inserted data
Below issue has been tested and failed:
2. Invalid Account Number
3. Invalid Ref. number
6. No validation at submit data
Scenario 1:
    1. Leave blank at "Customer Account Number" & "Reference 1"
    2. Click "Submit" button
Current Result:
    System display Data Entry details page without any error message
Expected Result:+
    System should display error message: "Enrollment details is required"
Scenario 2:
1. Enter enrollment details for 1st row
2. Leave blank at "Customer Account Number" & "Reference 1" for 2nd row
3. Click "Submit" button
Current Result:
System clear up all the enrollment details
Expected Result:
System should remain the 1st entered details.
Scenario 3:
1. Enter enrollment details for 1st row
2. Enter enrollment details for 2nd row
3. Click "Submit" button > System display confirm page with two row of enrollment details
4. Click on "Back" at confirm page
5. Clear all enrollment details for 2nd row
Current Result:
System display confirm page with two row of enrollment details
Expected Result:
System should display enrollment details for 1st row only.
Below issue has been tested and and successfully passed:
7. No validation at submit data
#8
 Updated by Ngoh Chee Onn over 5 years ago
- Status changed from Development / Work In Progress to Internal Testing
- Assignee changed from Ngoh Chee Onn to Erni Suhaireen Zulkifli
- % Done changed from 30 to 90
Hi Erni,
Please refer below for the finding and resolution, please test after deployment done at tonight.
Scenario 1:
1. Leave blank at "Customer Account Number" & "Reference 1"
2. Click "Submit" buttonCurrent Result:
System display Data Entry details page without any error messageExpected Result:+
System should display error message: "Enrollment details is required"Finding - Error message display in a incorrect div, cause not able to seen in screen.
Resolution - Update error message display on top of the page with content show validation message for which table row no.
Scenario 2:
1. Enter enrollment details for 1st row
2. Leave blank at "Customer Account Number" & "Reference 1" for 2nd row
3. Click "Submit" button
Current Result:
System clear up all the enrollment details
Expected Result:
System should remain the 1st entered details.
Finding - Current system only store the details value when no validation error.
Resolution - Store details value into session object once user click on submit button.
Scenario 3:
1. Enter enrollment details for 1st row
2. Enter enrollment details for 2nd row
3. Click "Submit" button > System display confirm page with two row of enrollment details
4. Click on "Back" at confirm page
5. Clear all enrollment details for 2nd row
Current Result:
System display confirm page with two row of enrollment details
Expected Result:
System should display enrollment details for 1st row only.
Finding - This is correct behavior to allow user edit all row value when click back from confirm page.
Resolution - No Fix.
#9
Updated by Erni Suhaireen Zulkifli over 5 years ago
- Due date changed from January 01, 2019 to January 04, 2019
- Status changed from Internal Testing to Development / Work In Progress
- Assignee changed from Erni Suhaireen Zulkifli to Nurul Hasnieza Bt Mohd Zamri
- % Done changed from 90 to 70
Hi Niza,
Please assist to move error message to be in descending order.
Thank you
#10
Updated by Nurul Hasnieza Bt Mohd Zamri over 5 years ago
- Status changed from Development / Work In Progress to Internal Testing
- Assignee changed from Nurul Hasnieza Bt Mohd Zamri to Erni Suhaireen Zulkifli
Hi Erni,
problem to move error message to be in descending order in auto debit data entry has been updated by Chee Onn. Kindly retest after deployment.
Thank you.
#11
Updated by Erni Suhaireen Zulkifli over 5 years ago
- Status changed from Internal Testing to Work Completed-End life cycle
- % Done changed from 70 to 100
All issue has been tested and successfully passed